Rear Speaker Replacement
This page describes my experience is replacing the rear speakers on my 1993
RX-7 base model. Note that I do not have the Bose sound system, so this is not a
replacement of the "Bose hose" but rather the 6x8" speakers in
the panels behind the seats.
 Why
Replace? Why
Replace?
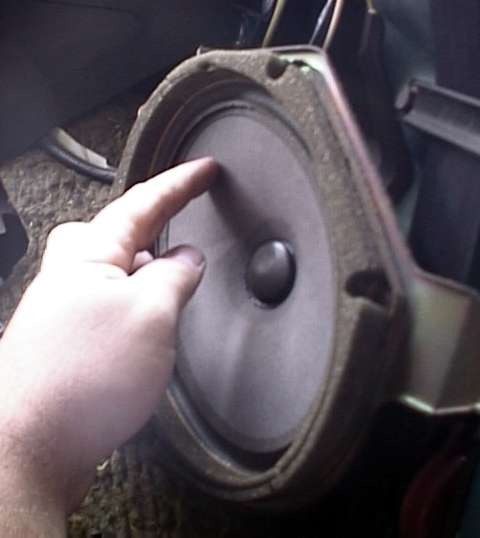
I don't have any plans for a big stereo system in my car, but after months of
strange noises coming from the rear speakers I decided to take a look at what
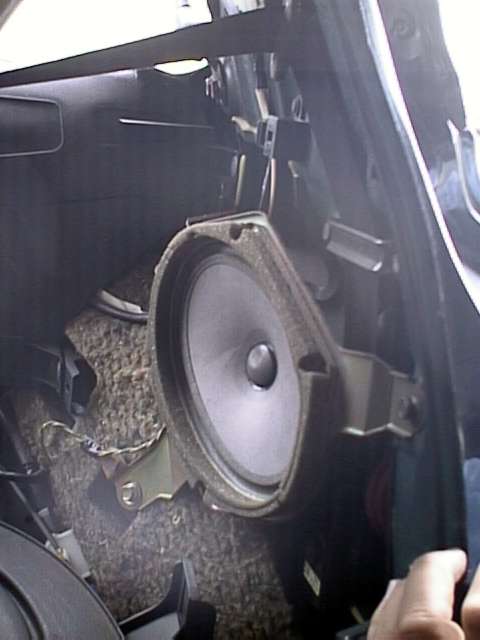
was back there. My car would make an awful crackling noise when playing heavy
bass, and it turns out the surrounds had disintegrated or ripped on the rear
speakers. Check out the picture at the right. This was the "good" one,
I pulled the really bad one out from the other side a few weeks ago and threw it
away.
Choosing Speakers
When I started my search for rear speakers, I was not even really sure of the
size I should be shopping for. As it turns out, the rear speakers are the
6x8" size that is popular on some Mazda, Ford, and Nissan models.
Apparently, this size is popular enough that several speaker manufacturers make
speakers specifically for these applications. 5x7"s should work, too, but
unless you really fall in love with a specific speaker that is only available in
that size, I strongly recommend that you limit your search to 6x8"s so that
they will be an easy install. The size is pretty important, because the speaker
is just suspended out in space and it probably needs to be the right size to
sync up with the trim panel to sound right.
My goals for selecting some speakers was to find some that sound good without
costing too much and that are efficient enough to not need an amp, because I
don't ever plan to install one. I also wanted to make sure that they had good
bass response, because that is the main purpose of the rear speakers in this
installation. The stock speakers don't have a tweeter and are not even dual
cone, they are just for bass and probably some mid-bass. After I installed my
new speakers, I found that higher-frequency sounds do not even make it to these
speakers with the stock electronics in place. For a moment, I felt a little
foolish for finding speakers with good full-range performance rather than
focusing exclusively on bass, but then I figured I might put in a new head unit
and feed the rears the full frequency range. Besides, the Pioneers have the best
low end, extending down to 30 Hz compared to 40-60 Hz which is the lower limit
for most speakers in this size.
I did a bunch of research online and listened to a bunch of speakers at the
local electronics and car audio stores. I listened to speakers from Polk, Cerwin
Vega, Boston Acoustics, Infinity, and Pioneer. I have owned several sets of
Infinity car speakers, and my favorite-sounding speakers ever were my friend's
Boston 6x9"s. However, a clear winner emerged from my listening tests --
Pioneer. Actually, there was a pretty wide range of fidelity among the different
Pioneer models in this size, but my hands down favorite overall was from
Pioneer. I feel very confident in recommending the Pioneer
TS-A6865 as an excellent speaker for this application. The trouble-free
install I experienced with these speakers makes me even more sure these are a
good choice.
Where to Buy
If you get a bunch of assistance from someone at a shop or plan to have them
do the install, buy from them. I did get a little help, but the price difference
between buying locally and buying online was too great to pass up, so I bought
online. After much searching for the lowest price, I ended up at a shop named 1Cache.
The lowest product price was with another place, but they wanted $30 to ship,
which is clearly some tactic to lure you in with low prices and then make money
on shipping and handling fees. Anyway, 1Cache shipped the product promptly and I
am a happy customer. The total was about $75 including shipping.
Installation
This was easier than I expected, but then again I always say that. I think it
is just not knowing what I am getting into that makes me think this stuff will
be harder than it really is, perhaps as a result of stumbling into a few jobs
that turned out to be harder than I expected. Whatever the case, I hope this
helps you decide whether this is something you want to do, and helps you
complete the job if you decide to take it on.
Step 1: Preparations
Gather up these tools:
- a #2 Phillips screwdriver
- a pocket knife or small flat-head screwdriver
- a medium sized flat-head screwdriver
- wire cutters
- wire stripper
- electrical crimper
- four red butt connectors
- pliers
Disconnect the seat belts from the seats and move them forward.
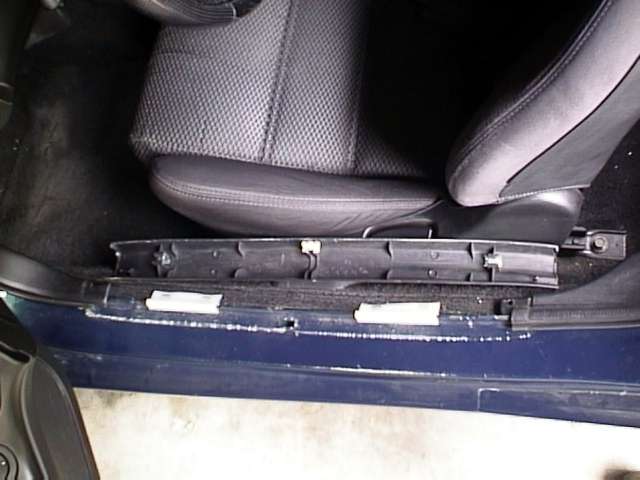
Step 2: Remove the door sill trim panel
Just pull it up, it has three clips and they just pop off.
Step 3: Peel away the rubber door seal
I didn't do this on the first side, but it makes the job easier and does not
damage anything. Just pick up the end and pull it until you have cleared the big
side panel that contains the speaker.
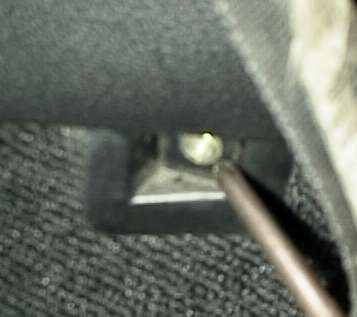
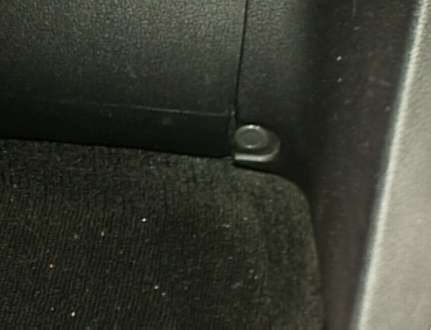
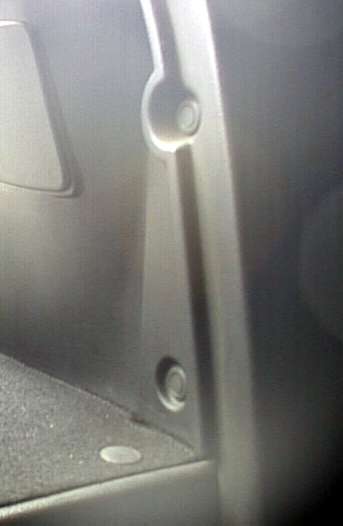
Step 4: Remove the trim fasteners
There are three of those plastic things were the middle pops outward, and one
screw holding each trim panel to the side of the car. You can get the plastic
thingies out by carefully prying up the center part with a knife or a small
screwdriver. The middle only needs to pop up a little bit and then you can
remove the fastener -- the middle part does not separate from the rest of the
piece. The screw is along the bottom edge, there is one plastic thingy on the
lower front side of the storage bin area, and two plastic thingies that are
covered by the plastic cargo area divider:
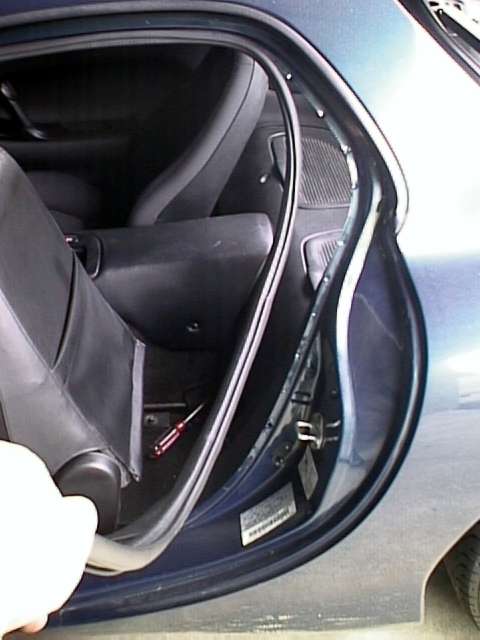
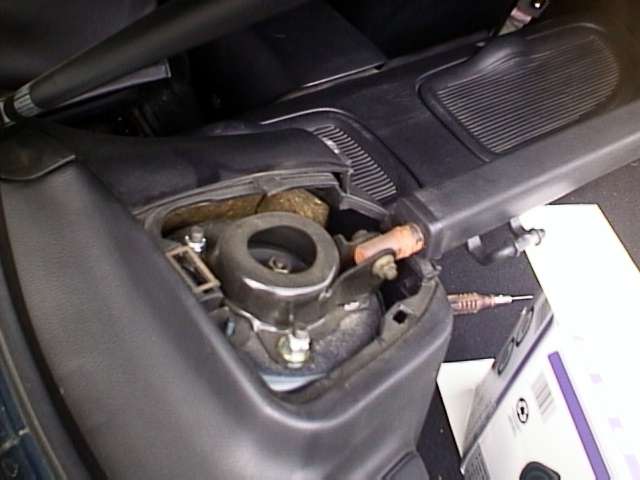
Step 5: Remove the trim from the shock tower
Just pull it off lifting from the back first. It has already been removed in
the picture below.
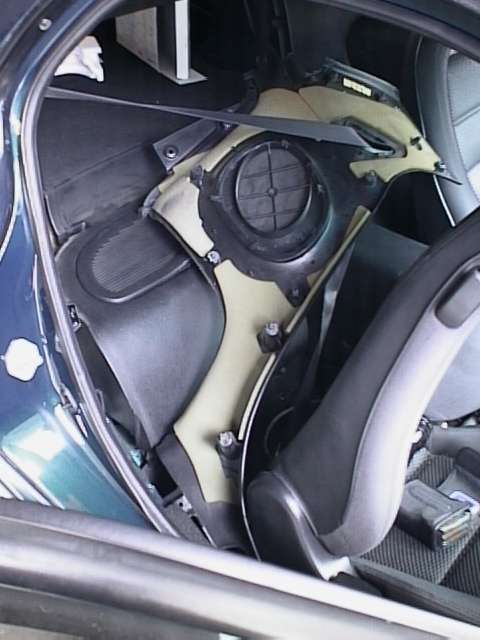
Step 6: Pop the panel off
Start from the top by prying a flat-head screwdriver behind the panel. There
are a bunch of clips that pop loose rather violently. I broke one on one side of
my car, but I think it was trying to reinstall everything after I discovered my
ailing speakers. Anyway, some of the metal clips might come off of their plastic
towers; be sure to recover them and put them back into place after you remove
the panel. This picture shows the panel removed -- take a look at the locations
of the clips if you are having trouble freeing the panel. Just push the panel to
the side once you have it loose.
Step 7: Remove the old speaker
The speakers are held in place with four Phillips screws. Remove the old
speaker and keep the screws because you will be using them to secure your new
speakers.
Step 8: Wiring
It is important to get the polarity of the speaker connections right or you
will have the speakers canceling each other out. For the driver's side speaker,
make sure you connect the Yellow & Blue wire the negative (-) speaker
terminal. For the passenger's side, connect the Blue & Yellow wire to the
negative (-) terminal. Cut the stock connector off and crimp on the new spade
connectors that came with your speakers. I chose to cut a few inches off the
stock wire and I shortened the wires I got from Pioneer by a few inches to avoid
having a lot of wire to rattle around back there.
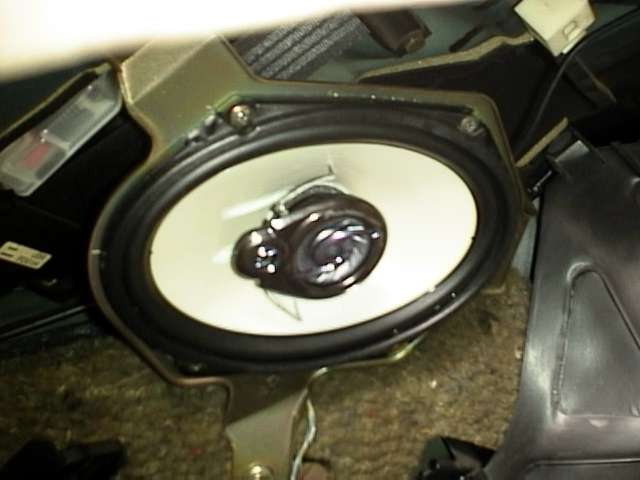
Step 9: Install the new speaker
For proper fit, I removed the extra mounting tabs from the speakers. There
are two per speaker and you can remove them by grabbing the tab with pliers and
bending them back and forth until they break off. The remaining holes on the
Pioneer speakers line up perfectly with the stock screw locations. I chose to
mount my speakers with the tweeters toward the front of the car, but I don't
have any good explanation about why that would be better than the other way. I
would suggest that you choose one way and mount both speakers with the same
orientation (tweeters in front or tweeters in back). Be sure to connect up the
wires (through the speaker hole in the bracket, rather than around the side)
before you mount the speaker. Use the stock screws to mount the speaker, but
make sure you have all the screws started before you tighten any of them down.
The screws seemed to interfere slightly with some plastic on the speaker at
first, but I tightened each screw progressively and the conflicts disappeared as
the speaker settled into position.
Step 10: Verify operation and put it all back together
Before you put all the trim back into place, I suggest that you turn on the
stereo to verify that your new speaker plays music. You could have a bad speaker
or a problem with your wiring and it would be a shame to put it all back
together just to take it apart again. Note that the speaker won't sound very
good just suspended in the bracket -- it needs the trim panel to work right. If
you are really concerned with audio performance, you may want to enhance the
seal between the speaker and the trim panel by adding some foam like the stock
speaker has. You may also want to install one or more audio products like
Dynamat or XTC speaker baffles with your speakers.
Once you are satisfied that your new speaker is functional, put the trim back
on in the reverse order that it was removed. To reinstall the trim panel, start
at the top by getting the plastic post into the hole in the sheetmetal. Then
just bang on the panel until all the clips click into place.
Performance
My car sounds a lot better than it did before I installed the speakers. The
bass is much tighter and I can crank up the volume without getting the awful
crackling that I got before. Does it sound better than it did new? I don't know
but I also don't really care -- I just wanted it to sound decent again and it
does. I was a little surprised that all the high frequency sounds seem to come
only from the front speakers, but I guess that it how the stock system is set
up. I used to think it was just the speakers that limited high frequency output,
but now that I have full range speakers in there, it is clear that that part of
the music signal is not sent to the rear speakers. Oh well, the bass still
sounds good, and if I ever upgrade the head unit I might run the full range of
sounds through the rear speakers.
Head Unit and Front Speakers
In my evaluation of what to do about my broken rear speakers, I also looked
at head units and front speakers. I figured I might do the whole thing while I
was at it, but I don't know how far I'll go now that the rear speakers are done
and the system is working well again. Anyway, I looked at a lot of head units
and I found it very difficult to find one that had amber illumination that would
match the gauge lighting. However, I did end up with a selection that met my aesthetic
and spending desires perfectly -- the Nakamichi CD-35z.
This unit is available in green or amber (not switchable -- you have to be sure
to order the right one). It is black and features an understated design that I
would be pleased to have in my cabin. This unit is available for about $180-$230
depending on where you get it. The best option seems to be to get it from a
local, authorized
Nakamichi dealer so they can install it and so you'll get the full three
year warranty (you only get a year if it you install it yourself). If your
system goals include a CD Changer, you can get the CD-40z
which adds changer controls. If you have good ears, you can upgrade from there to
the CD-45z,
which adds an outstanding D/A conversion section for improved sound quality.
I am still not sure what front speakers I would get if were to upgrade today.
The manual lists the front speakers as 6.3". Some sources indicate the
shallow 6.5" speakers will fit, while other sources recommend 5.25"
speakers. Pioneer makes a special application speaker that seems like it might
work called the TS-1620
II. I might be inclined to try those given my positive experience with the
rear speakers, but I haven't been able to listen to them anywhere yet. I did
listen to a bunch of 5.25" and 6.5" speakers, but I haven't found a
great bargain yet. I compared some Pioneer 6.5" 3-ways like the rears I got
to some entry-level Boston Acoustics 5.25" speakers and I couldn't decide
which ones I liked better. The Bostons were very noticeably cleaner sounding
than the Pioneers, but they seemed to fall off at the high frequencies. The
Pioneers played the highs but were kind of grainy in comparison. Maybe some
slightly higher-end Bostons with better tweeter would fit my tastes. I have
no good recommendations here; I just thought I'd share my findings so far.
| 


